Intellij IDEA Ktor 新项目新手最佳实践
2022-06-11 更新
默认框架生成,使用 Ktor 官方站:Ktor Start 更佳。
稍早前流水帐
写 API 有很多种语言和库,今天实践一下 Kotlin 的 Ktor。主要引用自:Ktor 官方文档
1、新建工程
从一个普通的 Kotlin 项目开始,比如叫 HelloKtor,构建系统我们选择 Gradle Kotlin,项目 JDK 16,目标 JVM 版本 16,测试框架 JUnit 5。
2、引入依赖项
文件:build.gradle.kts 中,在 dependencies 块中增加:
1
2
3
  implementation("io.ktor:ktor-server-core:1.6.7")
  implementation("io.ktor:ktor-server-netty:1.6.7")
  implementation("ch.qos.logback:logback-classic:1.2.5")
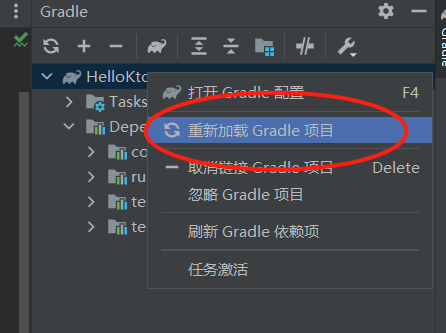
然后打开 Gradle 工具窗,重新加载 Gradle 项目,目的是让 IDEA 开始同步相应的 jar 包。
3、使用 EngineMain 建立一个服务
此时,默认项目创建的 Main.kt 可以不用了,先将其删掉。
然后在 src/main/kotlin 上右键,
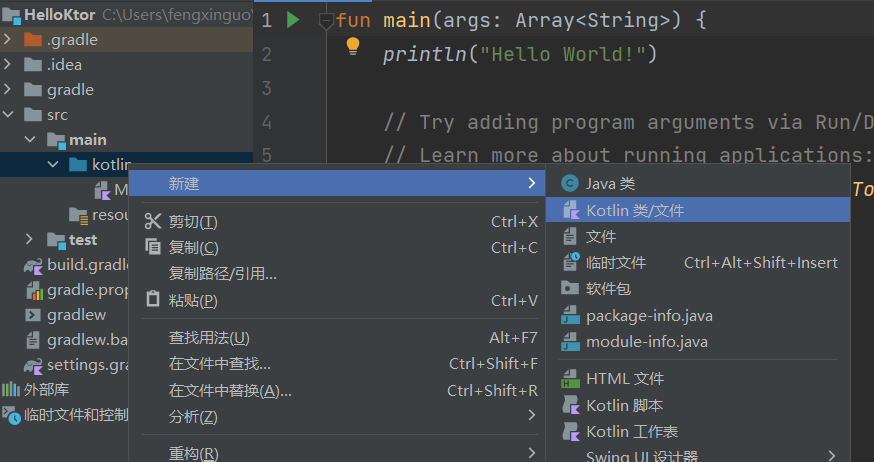
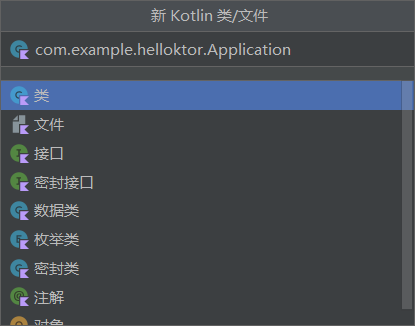
建立新的应用文件,比如叫:com.example.helloktor.Application
修改 Application.kt 文件变为如下内容:
1
2
3
4
5
6
7
8
9
10
11
12
13
14
15
package com.example.helloktor

import io.ktor.application.*
import io.ktor.response.*
import io.ktor.routing.*

fun main(args: Array<String>): Unit = io.ktor.server.netty.EngineMain.main(args)

fun Application.module(testing: Boolean = false) {
    routing {
        get("/") {
            call.respondText("Hello, world!")
        }
    }
}
将 Application.module 模块写到 resource/application.conf 中,以被新建的服务加载:
applicaton.conf:
1
2
3
4
5
6
7
8
ktor {
    deployment {
        port = 8080
    }
    application {
        modules = [ com.example.helloktor.ApplicationKt.module ]
    }
}
4、设置主类
修改 build.gradle.kts 文件:
1
2
3
application {
    mainClass.set("com.example.helloktor.ApplicationKt")
}
此时,完整的 build.gradle.kts 文件内容应该如下:
1
2
3
4
5
6
7
8
9
10
11
12
13
14
15
16
17
18
19
20
21
22
23
24
25
26
27
28
29
30
31
32
import org.jetbrains.kotlin.gradle.tasks.KotlinCompile

plugins {
    kotlin("jvm") version "1.6.10"
    application
}

group = "com.example.helloktor"
version = "1.0-SNAPSHOT"

repositories {
    mavenCentral()
}

dependencies {
    implementation("io.ktor:ktor-server-core:1.6.7")
    implementation("io.ktor:ktor-server-netty:1.6.7")
    implementation("ch.qos.logback:logback-classic:1.2.5")
    testImplementation(kotlin("test"))
}

tasks.test {
    useJUnitPlatform()
}

tasks.withType<KotlinCompile> {
    kotlinOptions.jvmTarget = "16"
}

application {
    mainClass.set("com.example.helloktor.ApplicationKt")
}
5、运行
打开你的终端,切换到项目主目录下:
1
./gradlew run
6、查看结果
打开浏览器或者命令行,发起对:http://127.0.0.1:8080/ 的请求,看到:
1
Hello, world!
7、打包成 jar 包
修改 build.gradle.kts,在末尾增加:
1
2
3
4
5
6
7
8
9
tasks.jar {
    manifest {
        attributes["Main-Class"] = "com.example.helloktor.ApplicationKt"
    }
    configurations["compileClasspath"].forEach { file: File ->
        from(zipTree(file.absoluteFile))
    }
    duplicatesStrategy = DuplicatesStrategy.INCLUDE
}
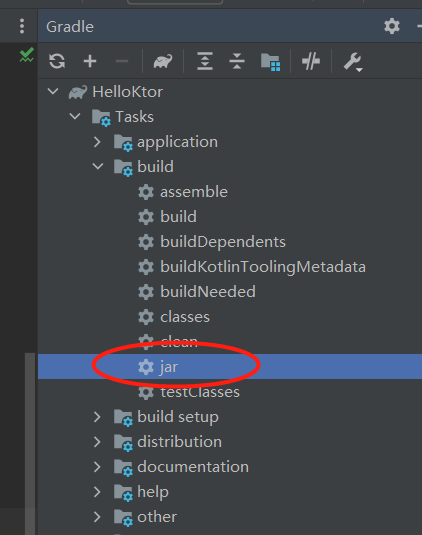
重新加载 Gradle 项目后,在如下图的 jar 任务上,双击编译输出 jar 包:
或者命令行下:
1
./gradlew jar
来打包 jar 包。
8、运行 jar 包
1
java -jar build/libs/HelloKtor-1.0-SNAPSHOT.jar
验证结果可以回到第 6 步。
9、测试
内容主要来源于:官方文档
引入依赖:
在 dependencies 块中,增加:
1
2
testImplementation("io.ktor:ktor-server-test-host:1.6.7")
testImplementation("org.jetbrains.kotlin:kotlin-test:1.6.7")
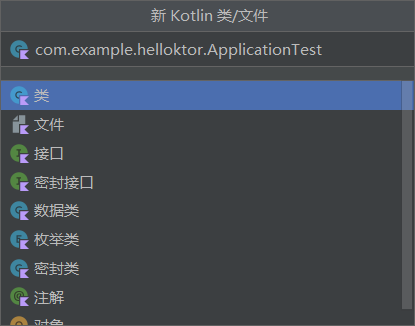
测试文件
在 test/kotlin 下新建测试类:com.example.helloktor.ApplicationTest:
文件内容如下:
1
2
3
4
5
6
7
8
9
10
11
12
13
14
15
16
17
18
package com.example.helloktor

import io.ktor.application.*
import io.ktor.http.*
import io.ktor.server.testing.*
import kotlin.test.*

class ApplicationTest {
  @Test
  fun testRoot() {
    withTestApplication(Application::module) {
      handleRequest(HttpMethod.Get, "/").apply {
        assertEquals(HttpStatusCode.OK, response.status())
        assertEquals("Hello, world!", response.content)
      }
    }
  }
}
测试
切换到命令行下:
1
./gradlew test
10、创建胖 jar 包
通常情况下,第 7 步中的方式没问题,但是,他们有人说这种方式更靠谱一点:使用 johnrengelman.shadow 来打包。
引入依赖
在 build.gradle.kts 的 plugins 块内增加:
1
id("com.github.johnrengelman.shadow") version "7.0.0"
创建构建任务
在 build.gradle.kts 中增加:
1
2
3
4
5
tasks.shadowJar {
  manifest {
    attributes(Pair("Main-Class", "com.example.helloktor.ApplicationKt"))
  }
}
打包
切换到命令行下:
1
./gradlew shadowJar